Writing Your First Bot in C#
Programming is like giving instructions to your computer, similar to how you would give instructions to a slave. Each instruction needs to be very specific and in a language the computer understands. In our case, that language is C#.
In GrindFest, a "bot" is a program that controls your hero automatically. We are going to use a programming language called C# to write this program to make your hero perform actions like fight monster, collect items, and explore the world.
The files that contain C# code (.cs files) are text files and you can edit them in any text editor, but you should use an Integrated Development Environment (IDE) a program that is made to edit the programming language you are using to make the code more readable and easier to write. This games comes with a bundled IDE called Visual Studio Code
Warning
If you know even a little about programming, skip the scripts and top-level statements and start with classes.
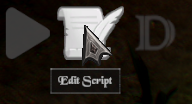
Press the "Edit Scripts" button in the top left corner of the game window to open the .cs file named after your hero with the bundled IDE Visual Studio Code
This .cs file is an entry point of your code, whatever code you put in there, the bot will try to do when you press the "Run" button.
For now replace contents of your .cs script file with following C# code
Hero.Idle(); // Makes your hero fight enemies in current location, drink health potions and pick up items
Running the Bot

Press the "Run" button in the top left corner of the game window (or the shortcut F5) to run your script. Don't press F5 in the VS Code editor, it won't work there.
Statements, Code Execution & Comments
Code consists of statements, which are instructions that tell the computer what to do. A statement can be a method call, a variable declaration, a loop, a condition, etc.
When your code runs, the computer executes the statements one by one, from top to bottom.
// double slashes mark a comment, something that is not code and will be ignored
Commets are used to explain the code to make it more readable
Hero.FollowCursorAndAttack(); // Makes your hero follow your mouse cursor and attack nearby enemies
Each statement (like a method call) in C# ends with a semicolon ; to tell the computer that this is the end of the statement. You can put multiple statements on the same line, but it's better to put each statement on a new line to make the code more readable.
Hero.Say("Hello World"); // Makes your hero say "Hello World" in the chat
Hero.Say("Let's kill some elves!"); // And after that, say "Let's kill some elves!"
Comments can be used to temporarily disable lines of code
// TODO: uncomment this line bellow to make your hero follow your mouse cursor and attack nearby enemies
// Hero.FollowCursorAndAttack();
To uncomment a line of code, remove the // at the beginning of the line.
Since the bot needs to be able to react in realtime, the game calls your code all the time, every frame to be specific, which is multiple times per second (based on your FPS).
Methods in the Hero class are smart enough to work even though you call them every frame. Hero.RunAroundInAreaAndAttack() will remember where it is running. Hero.Say does not to spam repeated messages. You can test how often this is happening by doing something like this:
Hero.Say("Random number: " + UnityEngine.Random.Range(1, 100000)); // Makes your hero say a random number between 1 and 100000
The Hero Class
Before we start writing our bot, let's understand what Hero is. The Hero class is what you'll use to control your character in the game. It has all the methods (actions) your character can perform, like:
- Moving around
- Attacking enemies
- Picking up items
- Drinking potions
- etc.
And properties (values) that represent your hero's current state, like:
You'll write code that will call these method and access these properties to make your hero do things in the game.
Method call
Think of a method call like using a TV remote control. When you press the "volume up" button (call a method), it does something specific (increases the volume). In programming, we write:
remoteControl.VolumeUp(5); // Increase the volume by 5
You are telling computer you want to call method VolumeUp on the object remoteControl and you want to increase the volume by 5.
This is a method call of a method Idle() on a static class Hero representing your current hero. Let's break down what each part means:
Hero.- Object we want to call this method on, in this case it's a static class Hero representing your current hero.Say- The name of the method we want to call, in this case it'sSay, which makes your hero say something.- Quotes
"Hello World"- Tell the computer this is text (called a "string") and must be enclosed in quotes - Parentheses
()- Hold the information the method needs, like what to say in theSaymethod - Semicolon
;- Like a period at the end of a sentence - tells the computer this instruction is complete - Capital Letters - C# cares about exact spelling:
Herois different fromhero
The statements are executed in the order they appear in the file, from top to bottom. But when you call a method, the code execution jumps into the method and continues in there. When the method finishes executng it's code, the code execution returns to the place where the method was called and resumes from there.
Similar to the code we are now writing, the method like Idle contains it's own sequence of code statements, this one has quite high-level functionality and does a lot of things for you. It makes your hero fight enemies in the current location, drink health potions and pick up items. You can find documentation with source code here.
Tip
Don't worry if you don't understand anything right away. You can just leave your bot calling Hero.Idle(); to do some basic stuff, and maybe add a shortcut for drinking potions. If you don't want to follow tutorials, you can try copying the example code from Idle() and try to make small changes and watch what your hero does.
For now let's continue with the next section to learn more about the basics of C# programming.
Parameters
Some methods have parameters, that tell the method what exactly to do. If you want to GoTo sometwhere - where to go, if you want to Say something - what to say.
If the method takes any parameters, you need to pass them inside the parentheses as argument1, argument2, ....
Parameters are a way to pass information to a method, like what to say in the Say(string) method.
Return value
Some methods can return a value, like the FindNearestItemOnGround() method, which returns the nearest item to your hero. You can use this value to do something with it, like pick it up or equip it or store it in a variable for later use.
Common Mistakes
- Wrong Name: Make sure you spell the method name correctly, including capitalization. C# is case-sensitive, so
Hero.say()orhero.Say()is not the same asHero.Say(). - Missing Arguments: If a method requires arguments, make sure to provide them. For example,
Hero.Say("Hello");is correct, whileHero.Say();is not. - Missing Semicolon: Every statement must end with a semicolon
;. If you forget it, you'll get an error.
What to do next?
- Movement & Combat (variables, conditions)
- Pick up & Equip Items (foreach loops)
- Hero class api reference
- Hero.Idle() basic bot implementation
- Debugging
- Classes (Advanced)
- AutomaticHero class api reference
Tip
New to VS Code? Check out our VS Code Basics tutorial to learn essential features and shortcuts that will make you more productive.
Alternative IDEs

![]() Visual Studio Community Edition
Visual Studio Community Edition
.NET SDK
If you are missing the .NET SDK, you can download it from here
//: # ()auto-save enabled //: # () //: # () //: # () //: # (follow quest)